At Legalboards, we want to help you and your team collaborate more effectively. One of the ways to improve how your team works is adding board members to your Legalboards account. These members can be view-only or have the ability to make changes, so you can work effectively, so managing board members is easier than ever.
In this guide, we’ll walk you through how to manage board members within your Legalboards account. If you’re more of a visual learner, check out the video guide below or on our YouTube channel.
Managing Board Members
Editing Board Members
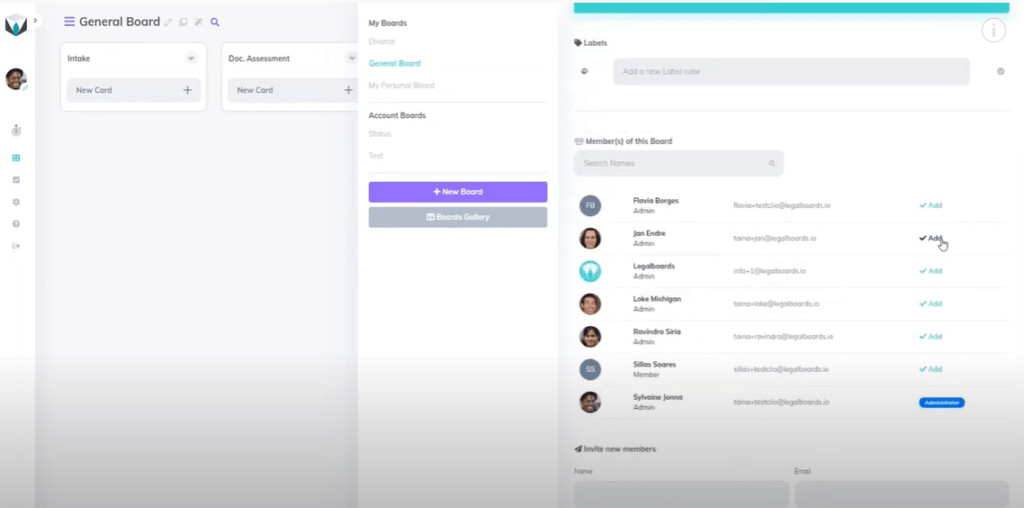
Managing board members in Legalboards is easy. The first step is to go to a board and click on the pencil icon (“Edit this board”) next to the board’s name.
From here, we can add, edit, or invite new members to the board we select, as seen below.

We can easily add or remove members by clicking the “Add” button next to a name. When members are added, this icon will change to “Remove”, which allows you to remove them from the board. Also remember that you can edit members at any time!
Inviting New Members
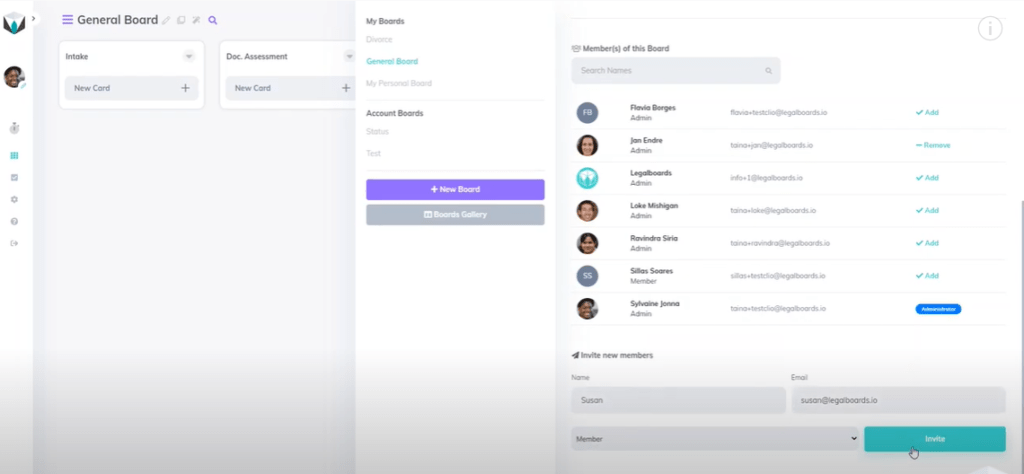
If we want to invite new members, we’re going to scroll down within the menu to the heading “Invite New Members”. To invite a new member, we just need to provide their name and email and then select what kind of permission they will have.
Types of Permissions:
- Admin: Admin permission allows a member to manage all features. These members can use boards that are shared with them and create their own.
- Viewer: Viewers can only access the boards that are shared with them but do not have permission to make changes.
Once we’ve selected a permission type, we’ll click on the “Invite” button to invite that person to the board, as seen below.

Once that invite has been sent, the person will appear under the “Invite New Members” heading similar to the “Member(s) of This Board” heading. If you want to change this, you can also hit the remove button.
Need Some More Help?
Didn’t find what you needed? Learn more about other features in Legalboards by checking out more videos or visit our support portal for more help.


