In this guide, we’ll walk you through setting up our newest automation action: Checklist Creation. This automation will allow you to automate your task checklists. By setting this automation, you and your firm will be able to save time and become more efficient.
If you’re more of a visual learner, check out our video guide below for the step-by-step process.
https://youtube.com/watch?v=Z-Rury1LlG4%3Fcontrols%3D1%26rel%3D0%26playsinline%3D0%26cc_load_policy%3D0%26autoplay%3D0%26enablejsapi%3D1%26origin%3Dhttps%253A%252F%252Flegalboards.com%26widgetid%3D1%26forigin%3Dhttps%253A%252F%252Flegalboards.com%252Fresources%252Fautomations%252Fautomation-action-checklist-creation%252F%26aoriginsup%3D1%26vf%3D1
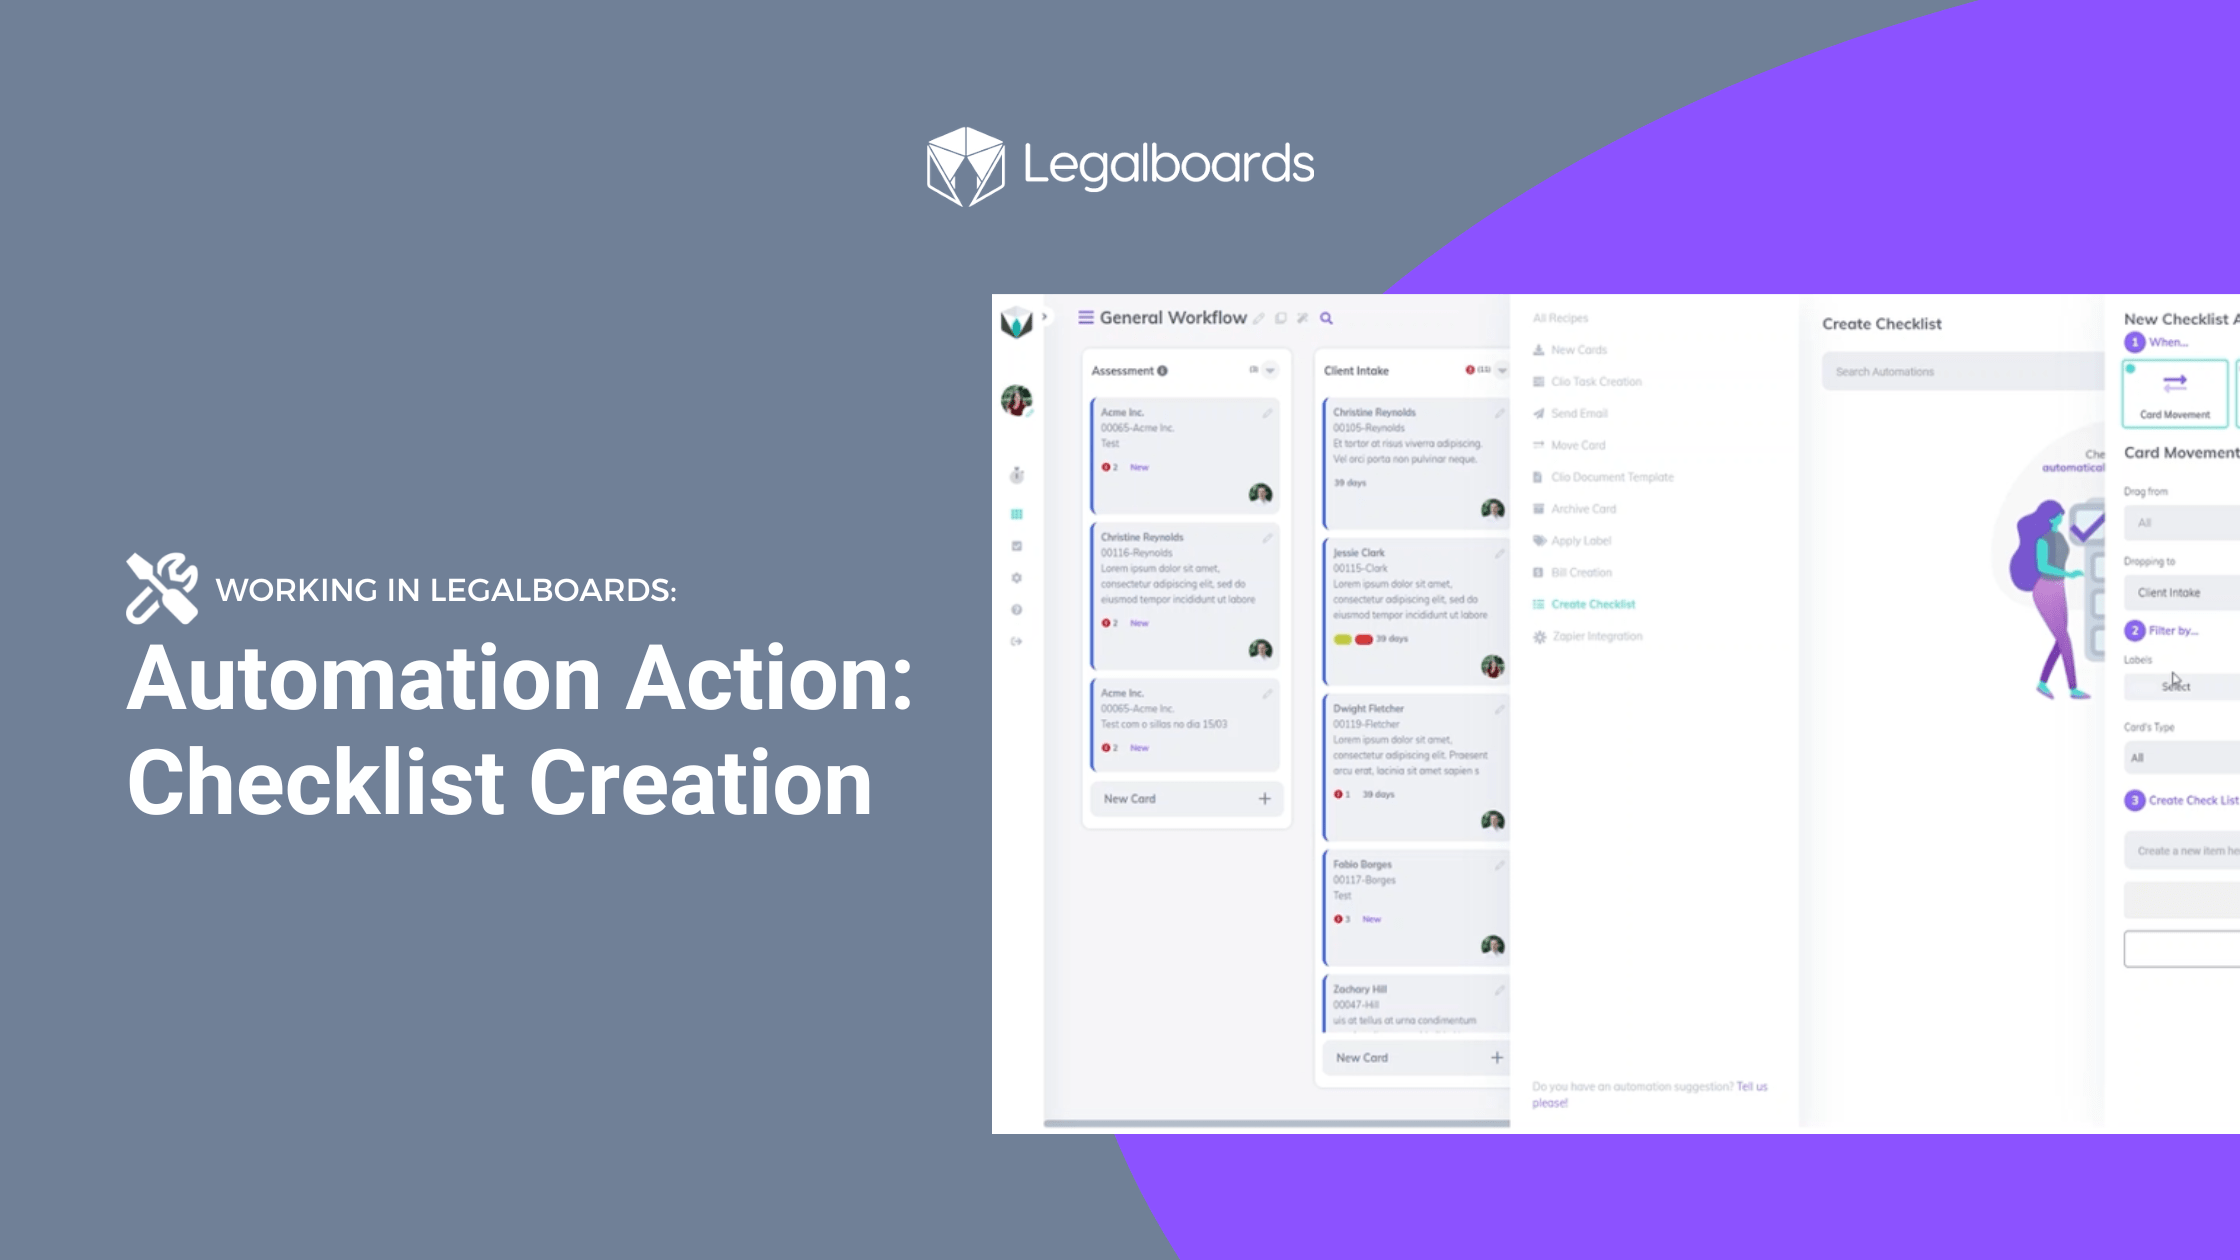
The first step to automating a board is to choose which board is most appropriate and click on the “Automations for this board” icon. Overall, automations follow the same three steps of when, filter, and automate.
Creating the checklist creation automation will have the common steps of when and filter but the last step is to set up the checklist items.
Step 1: When
When the sub-menu appears, click on the “Create Checklist” category and the button “New Automation”. As with any automation in Legalboards, you’ll need to define your when or trigger action, which you can find more about triggers here.
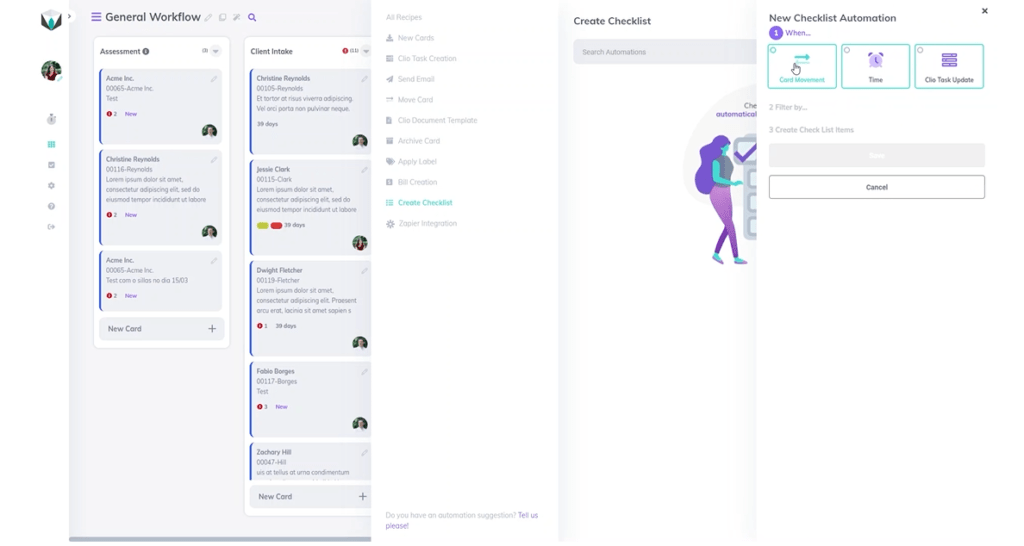
Try to think of when the checklist creation is most appropriate for a task. You can specify the checklist creation automation to be triggered from a card movement, be time-based, or if you’ve integrated Clio into your account, based off a Clio task update.
Trigger Actions
The first type of trigger is card movement. If you choose this trigger, you’ll need to specify some categories which are covered in our card movement guide. Please note the categories of “drag from” and “dropping to” do not both need to completed, but at least one does need to be specified.
In our example, let’s specify the dropping to movement to be any card moving to the client intake column.
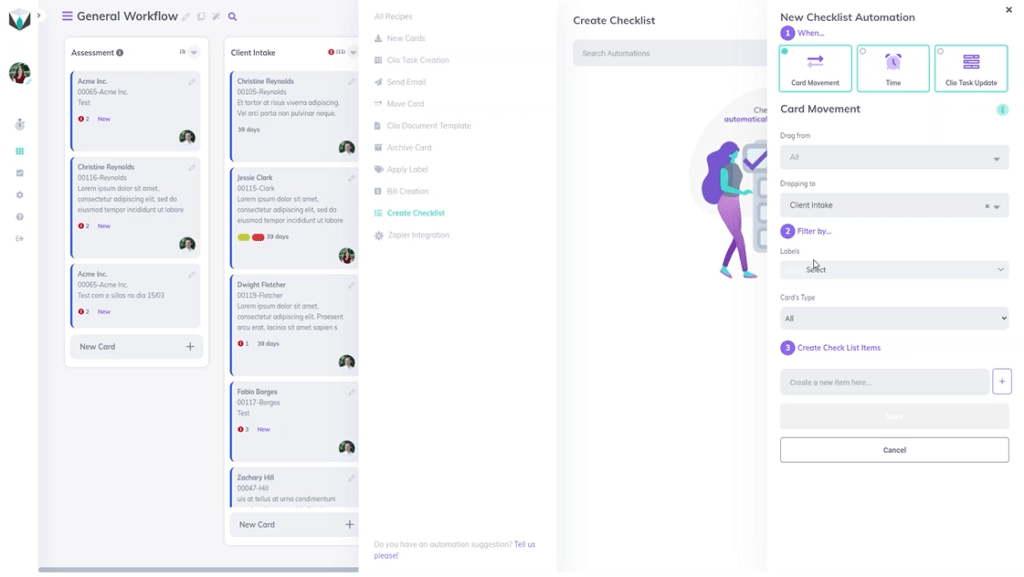
Step 2: Filter
In this section, we will need to assign any necessary labels as well as card types that should be associated with this automation.
In our example, we’re looking to create a checklist for client intake, so we will not specify any card types. This will mean any card entering the client intake column will trigger the same response.
Step 3: Create Checklist Items
From here, we just need to create the items for our checklist. We want to try and create a list of tasks that would cover the majority of actions needed.
In our example, let’s cover some basic tasks associated with a client intake. We’ll make our checklist consist of “open the client file”, “create the NDA model”, “start the initial billing”, and “create the draft contract”.
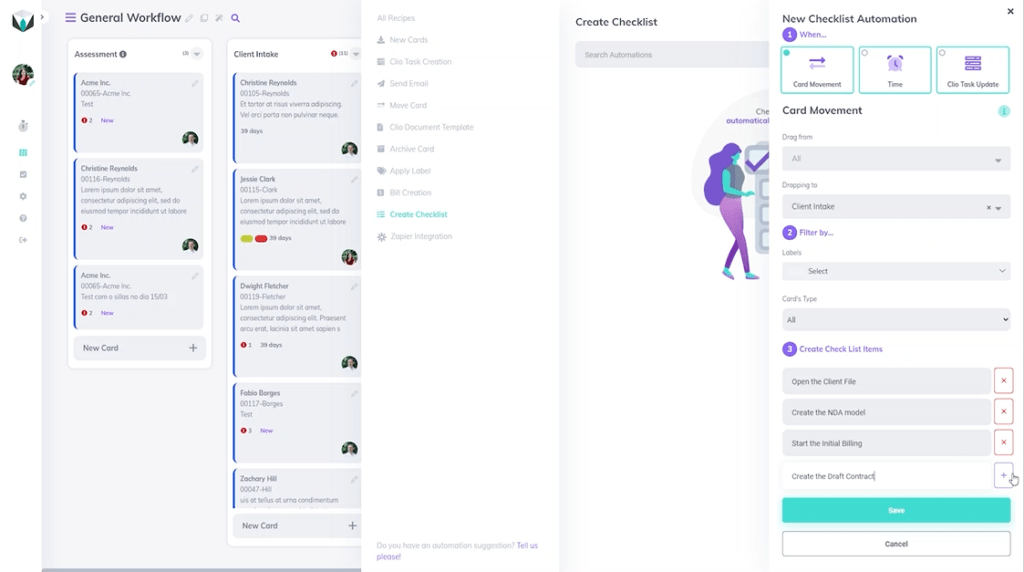
Once you’ve created your list items, be sure to hit the save button in order to complete the automation creation. Now when you click on the card, you can see the checklist items and will be able to check off the items as they are completed.
If you need more help check out our support portal or YouTube channel for more video guides.