Having multiple checklists within the same card in Legalboards can be super helpful. With the ability to create multiple checklists, you can improve the organization of your workflow by enhancing your cards.
In this guide, we’ll walk you through how to create multiple checklists within the same card in Legalboards.
How to Create Checklists
Let’s start by clicking on a card within our board. From the sub-menu, we’re going to focus on the “Start a Checklist” field. In our example, we’re going to add the item “Get Documents” here.
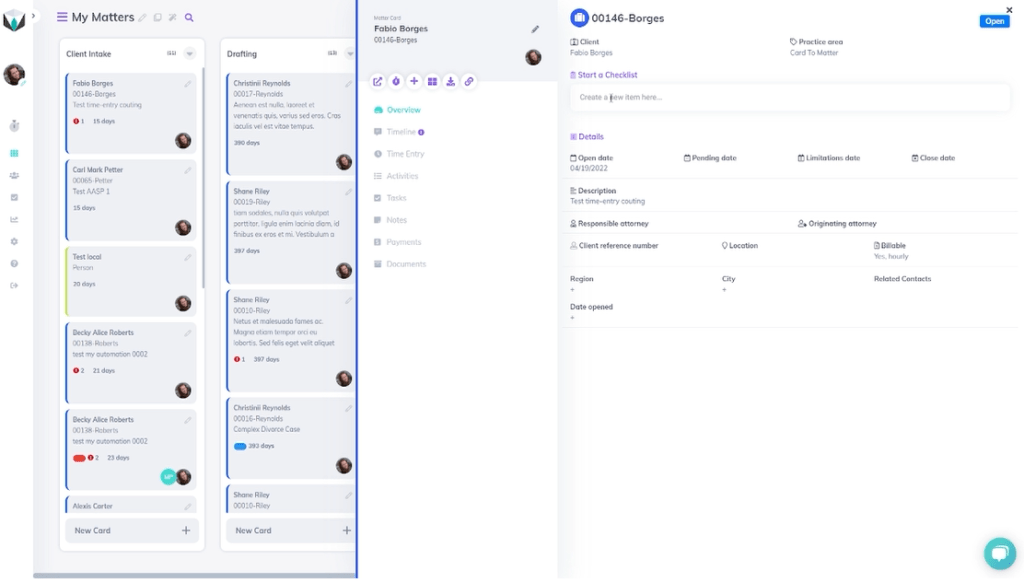
Once we’ve added that item to the checklist, it will appear under a sub-menu called “My Checklist”, as seen below.
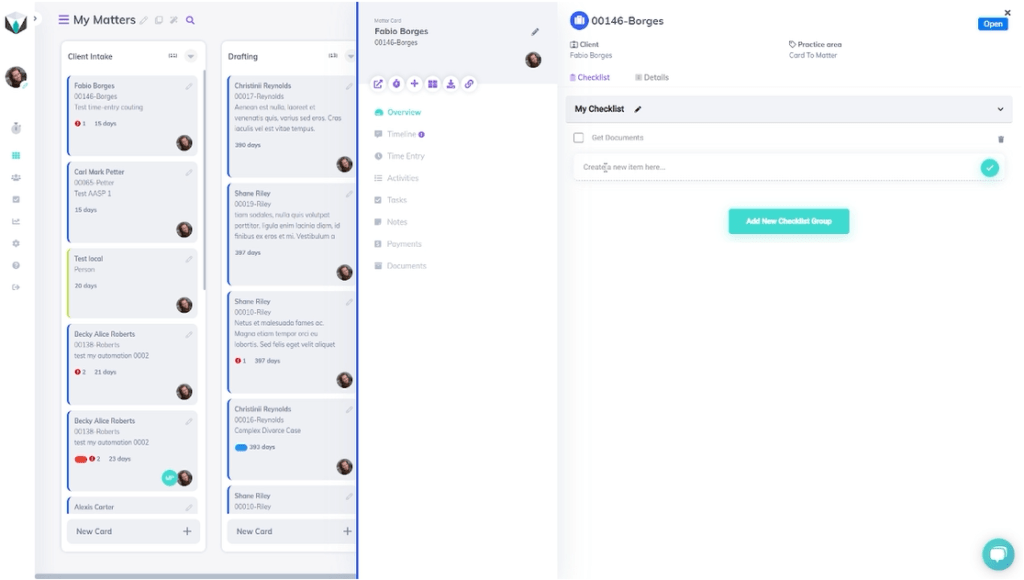
From here, we can add more items to the checklist for this card. For our example, we’re going to add three more items on our checklist (“Start Doc”, “Call to Client”, and “Send Doc”) that are relevant to the card. Once we’ve added these tasks, we have now created one checklist.

To create another, we’ll click on the “Add New Checklist Group” and give it a name. For this example, we’ll name the new checklist “Accounting” and click on the name to be able to add new items to this new checklist within the card.
For this specific list, we’re focused on billing activities. So, we’ll add the items “Start Bill”, “Approve Bill”, and “Contact Client” to the checklist (shown below). A reminder, by clicking the checklist name, the items will be shown.

Completed Items and Changing Names
Completed Items
The goal of creating a checklist is to break up a larger task into smaller and easily completed steps (find more about the difference in our resource). So, let’s go over what happens when you complete an item on a checklist.
When we’ve completed an item, we can click on the name of the checklist that it’s associated with. In our example, we want to update the checklist to reflect the completion of one of the tasks on the “My Checklist” checklist.
By clicking the box next to an item, it’s then marked as completed. To see these items, we can click the purple text (“View Completed Checklist”) next to the checklist name.
Changing The Name of a Checklist
In our example, we also want to change the name of the “My Checklist” checklist to “General Checklist”. We can change the name by clicking the “Edit” button next to the checklist name, where our screen will look like the one below.

To change the name, we’ll update it to be “General Checklist” and select the save button to save the changes.
Still, Need Help?
Didn’t find what you needed? Check out more videos, visit our support portal for more help, or contact our support team.